Introduction
Choosing an image and getting an idea of how it may look can be a bit of a cumbersome task. Especially if you want to do it on the spot with your client to lock in the sale.
In this guide, I’m going to walk you through how you can clients by using some simple online tools to show your clients how potentially their printed splashback can look.
I’ll walk you through how to use Shutterstock to help your client pick their image, and show them how it can look once it’s cropped.
What does this solve?
- Going back and forth with your client and printer.
- Misinterpretations of why images will and will not work.
- Having too many people in the equation.
What do you gain?
- Your client will be able to visualise how their splashback in real-time.
- Being able to convert enquiries to the sale so the spot by showing them how they can have their image.
- Allowing the client to visually see why specific images will not work with their size and aiding them to choose the correct image.
Thankfully there are tools online that will help and aid you or your client with this.
We’ll be using Shutterstock though out this guide as it has great tools and features.
It is recommended to have an account to purchase the final image (more on this later)
Knowing your splashback size
It’s good to already know what size splashback you’re dealing with. This is something between you and your client to work out but let’s say you already have been out to measure.
for this guide, we’ll use a generic 2500mm x 700mm splashback.
Choosing an image
There are many places one can find an image. To make life simpler, we recommend using Shutterstock.
Shutterstock has an image editing tool where you’re not required to have an account or be logged in (An account is required to download, more on this later)
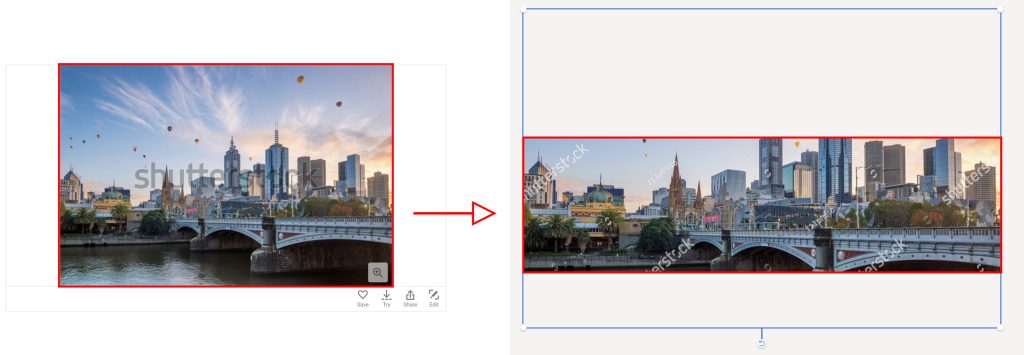
Cropping the image
Now it’s time to crop the image to suit the splashback.
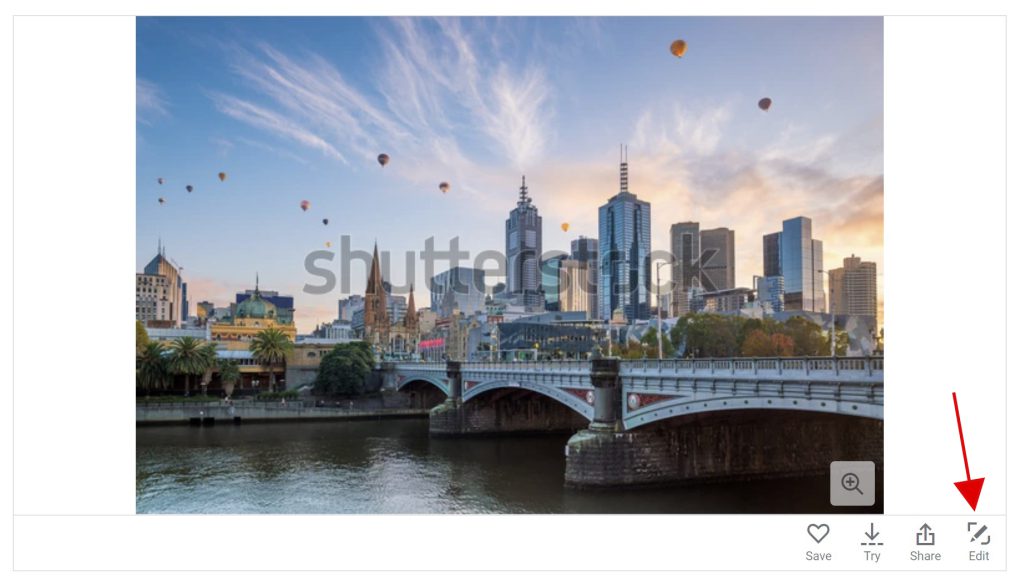
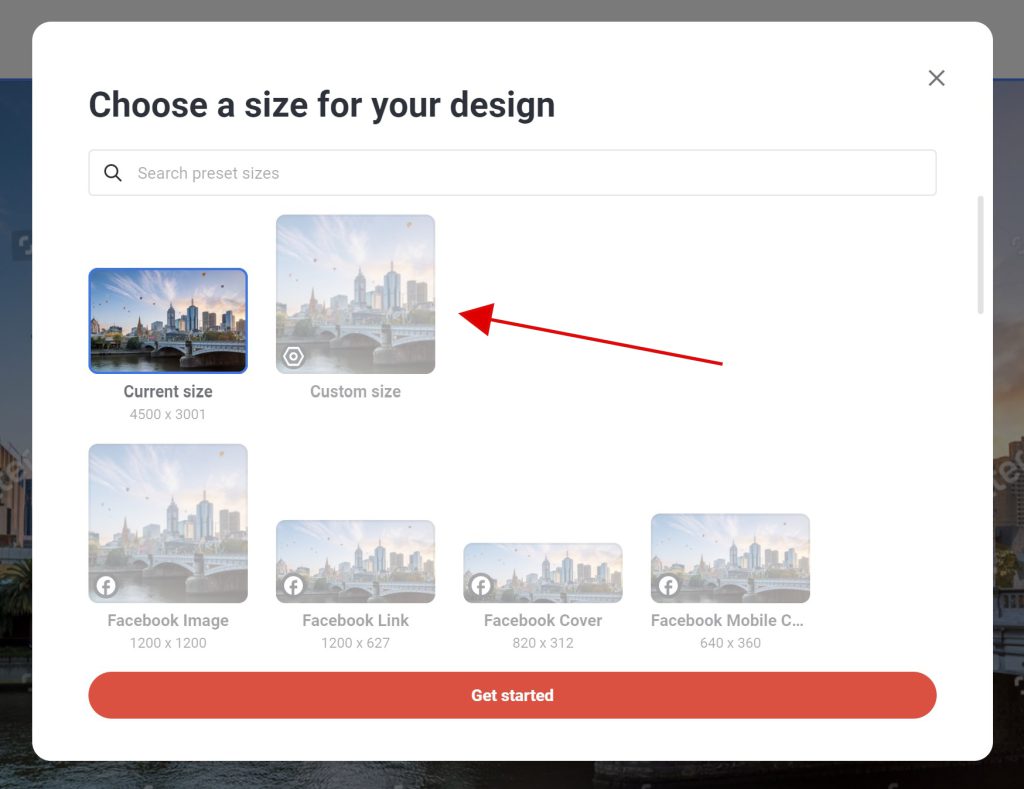
Once you or your client has picked an image, you can click “edit” and it’ll redirect you to the Shutterstock editing tool. It will ask you to “Choose a size for your design” Now you press “Custom Size”. From the dropdown box, select Centimetres. Now enter your splashback size which was 2500mm x 700mm. In CM That’s 250cm x 70cm.
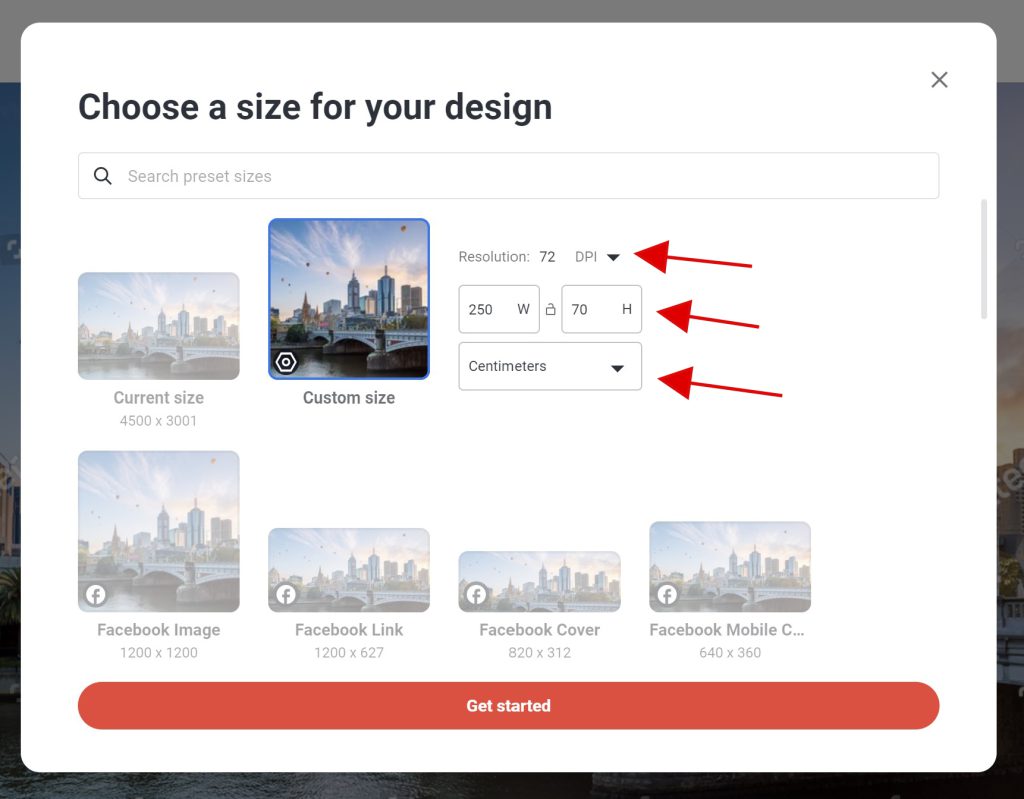
The default resolution should be 300DPI (dots per inch). When you enter your size and if the image is too small an error will come up and let you know it’s too small. You can lower the DPI, we don’t recommend anything lower than 150dpi, but you can lower it to 72dpi (most of the time it should print ok)
We always print with a standard of 150 dpi. If the image is 72dpi our software will upscale it pretty well.
When you’ve entered the size and it’s allowed you, press “Get Started”
If it hasn’t allowed you, an error will show up and inform you that the image is too small.
Editing the photo (optional coloured filters)
From here, you can reposition the image by clicking the image until a box shows up and dragging it to where you or your client would like.
Optional – You or your client can also edit the image by adding a filter to it, such as Black & White, Sepia or any other filter they offer. To do this, you click the image and select filter.
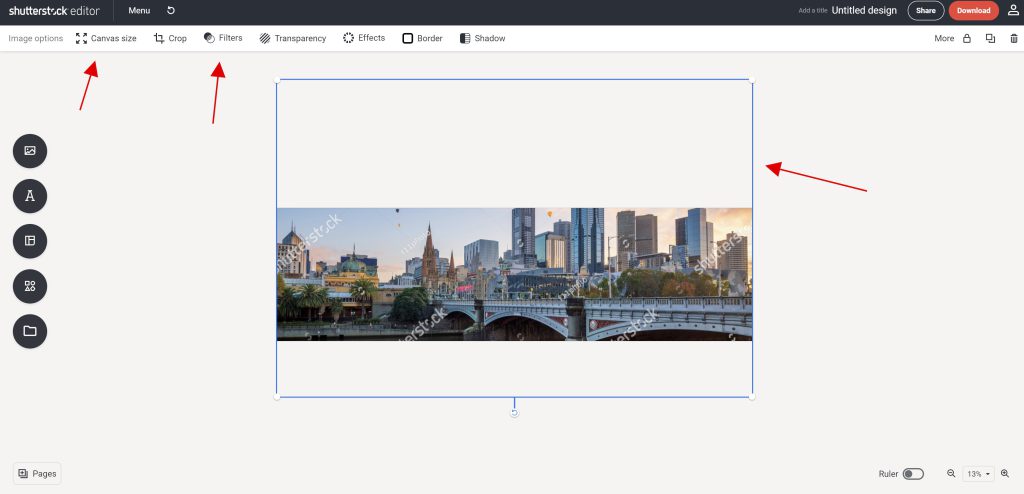
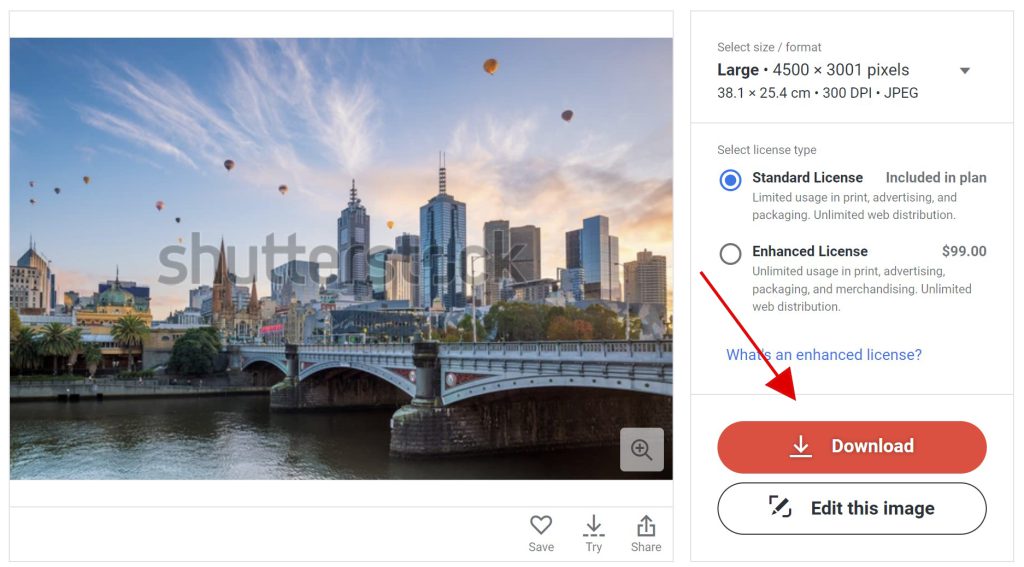
When you’re done, you can purchase and download the image. (you can re-edit the image if you change your mind before sending it to your printer)
Making an account
With any stock image website, the images are not free.
When you create an account, make sure you select the “On-demand packs” This way it only costs you $50 for 5 images. And there’s no recurring subscription.
If you’re using us as your primary printer, we recommend sending the cropped image and the original full-size image (just need to redownload it before the edit screen) just in case we need to modify it.
Other websites
There are other stock image websites out there. We found the editor on Shutterstock better than the rest.
Others like iStock do have an editor but it’s limited to cropping in pixels and not cm.
To get around this, you can multiply the splashback size to get the print resolution.
~72dpi: 29 x (your size in cm)
~150dpi: 59 x (your size in cm)
~300dpi: 118 x (your size in cm)
E.g 59 x 250cm = 14,750px wide & 59 x 70 = 4,130px tall.
We hope this guide is helpful and allows you to win more clients with printed splashbacks.
Disclaimer: We’re not in any way affiliated with Shutterstock. In our opinion, out of a few stock image websites we believe Shutterstock to have the better, easier tools to use.